
Our available product inventory does change over time, particularly in regard to bead colors/styles, so if you see something in the supply list that is no longer available, feel free to substitute with another one of our products.
Projects


| 35% Off Sitewide | <span style=font-weight:800>35% Off!</span> |
Our available product inventory does change over time, particularly in regard to bead colors/styles, so if you see something in the supply list that is no longer available, feel free to substitute with another one of our products.
Add this whimsical jungle-themed topper made with Perler fuse beads to a cake for a birthday celebration or baby shower.
It’s planting season! This pretty fuse bead container for seed packets makes a great gift for any gardening enthusiast.
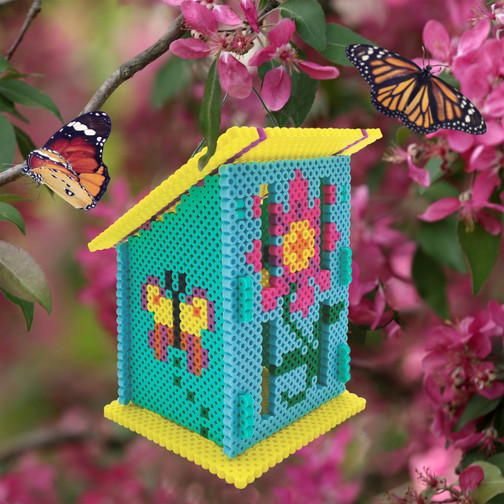
Welcome winged beauties to your garden with this pretty butterfly house made from Perler fuse beads.
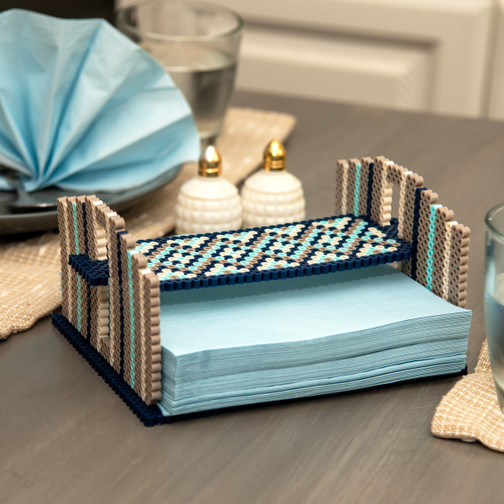
Keep your napkins secure and organized with a holder made from Perler fuse beads. Perfect for everyday use or for special parties or picnics! Tailor the colors to your décor or occasion.
This unicorn carousel made from Perler fuse beads will add a splash of color and a bit of magic to your room.
Add a garden-themed design to your door or wall with this unique hanger made from Perler fuse beads.
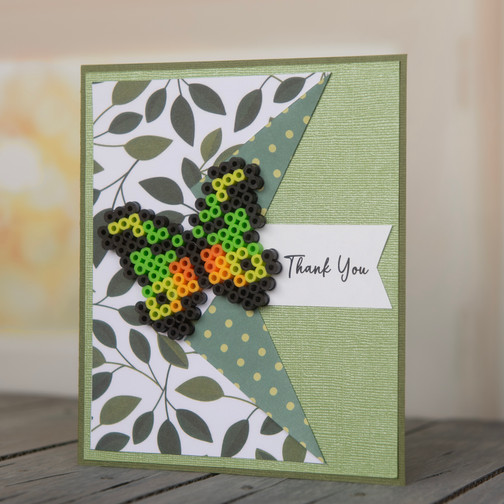
Express your gratitude with this stylish Thank You card that features a colorful fuse bead butterfly.
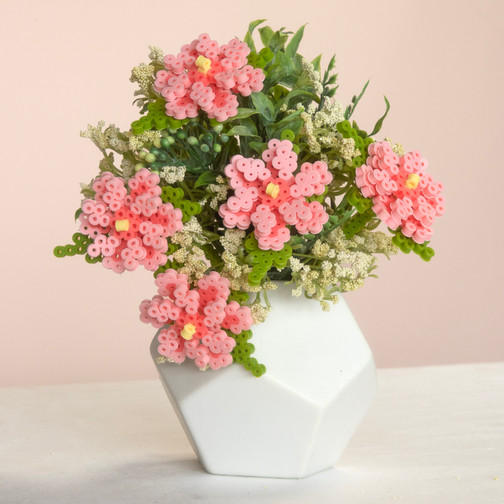
Spring is here! This 3-D floral bouquet made from Perler beads is the perfect way to welcome a new season.
Welcome spring and the return of feathered friends with this flowery bird feeder made using Perler beads.
Patterned eggs are the focus of this Easter greeting card. Make several to share with family and friends.
This contemporary design features apricot, which is a close match to the Pantone Color of the Year 2024, 13-1023 Peach Fuzz, a color that is “radiant with warmth and modern elegance.”
Add simplistic elegance to your home décor with this framed Snappix geometric design. No ironing required and it can be completed and ready to hang in one afternoon!
Pets love treats! Use Perler fuse beads to decorate this clever container that holds treats for your favorite four-legged friend.
These heart-shaped toppers will make even the sweetest cupcake a little bit sweeter! This fuse bead project is perfect for Valentine’s Day treats.
February is for championship football! Snap Perler beads into the flexible canvas to build your Snappix design. This sign will be a welcoming invite for any Super Bowl party!
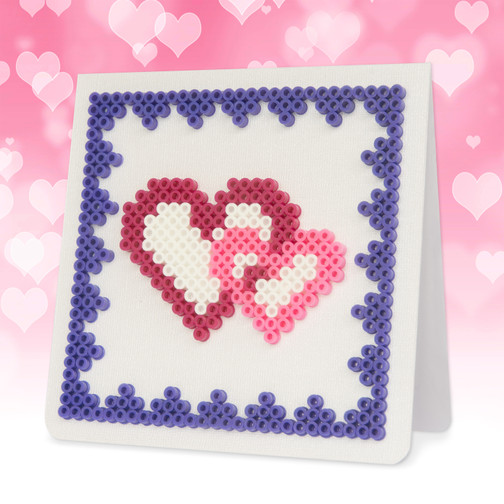
Create a sweet Valentine’s Day greeting using Perler fuse beads. It’s a great way to show your love to family and friends
Create this unique Snowflake Suncatcher trio using Perler fuse beads. The opalescent insert will reflect the sunlight and brighten a snowy day.
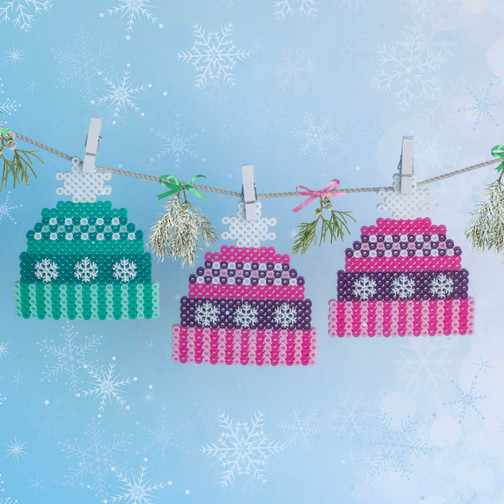
Create some fuse bead winter hats to decorate your space this winter. Add a magnet to the back, clip onto a ribbon or string to make a garland, or prop on a shelf.
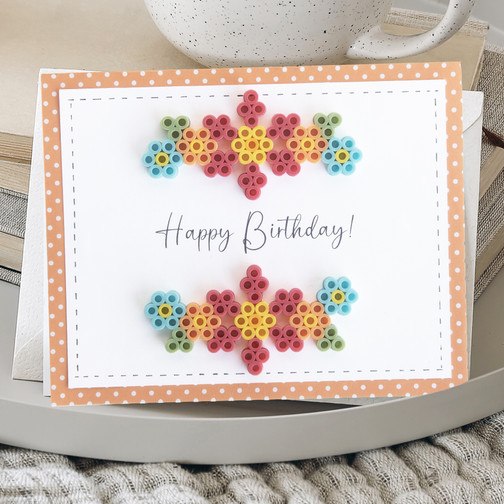
Make a handmade card for all the special people in your life with this easy-to-make birthday greeting.
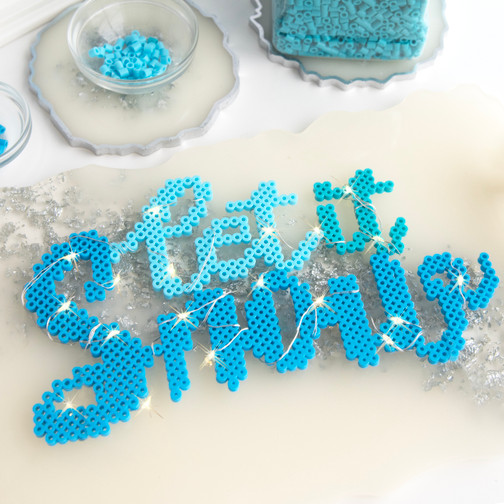
Fairy lights add the right amount of sparkle to this unique fuse bead décor that’s perfect for displaying all winter long.
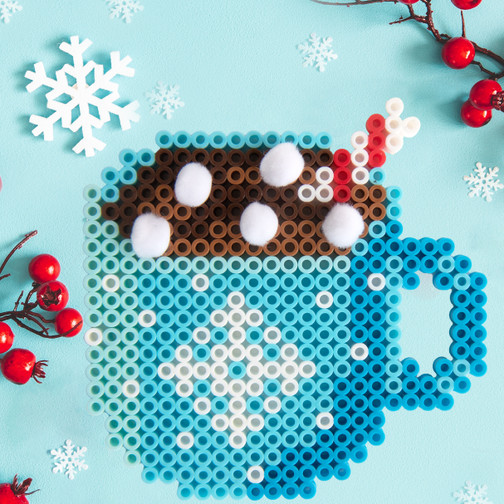
It may be cold outside, but you can stay inside to make this fuse bead project that features a fun mug of hot cocoa topped with marshmallows.
Ring in the new year with this sparkling Happy New Year banner! This quick and easy project features fuse bead letters mounted on glitter cardstock pennants.
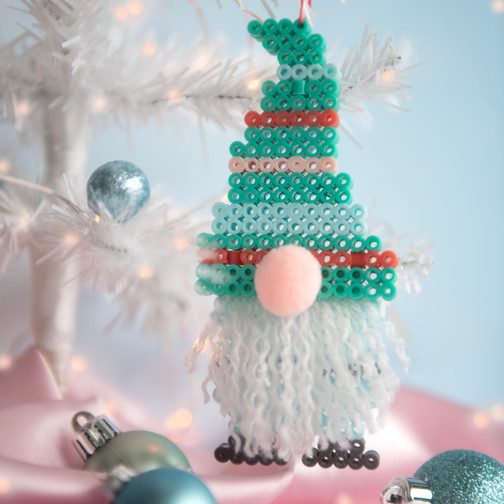
Gnomes are usually found in the garden, but this cute fuse bead gnome will be a great addition to your holiday decorating. The colors used on this project also make it suitable for year-round displa
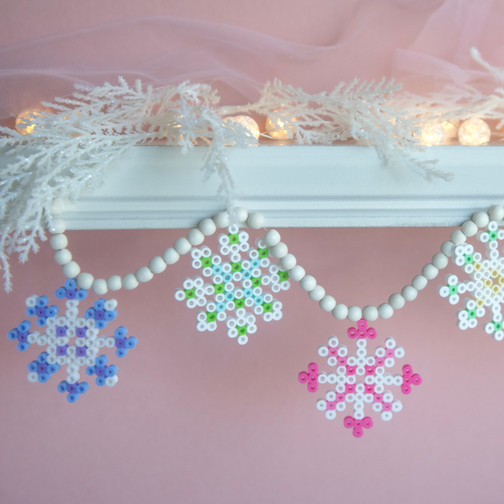
Add a bit of whimsy to your mantel or bookcase with this fun snowflake garland.
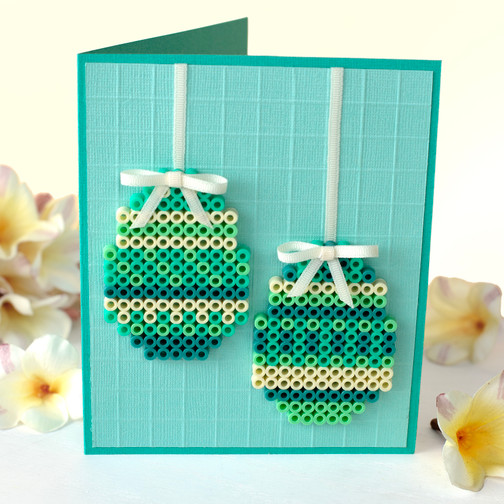
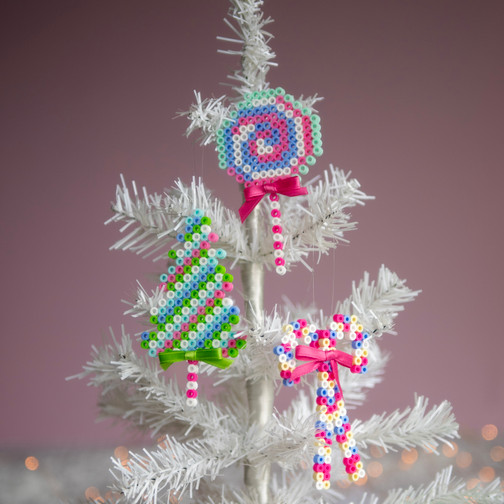
Use these cute holiday ornaments on your tree or as gift tags for family and friends.
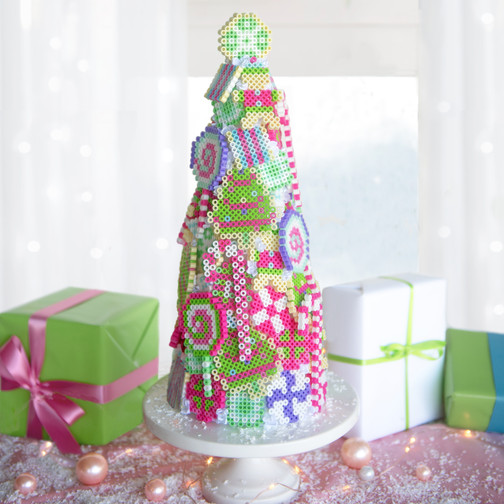
Traditional holiday treats come together on this unique table centerpiece.
Create a pastel gingerbread house using our Perler Snappix frosted canvas and classic beads. We framed our finished design, but you can also use coordinating string or ribbon to hang it.
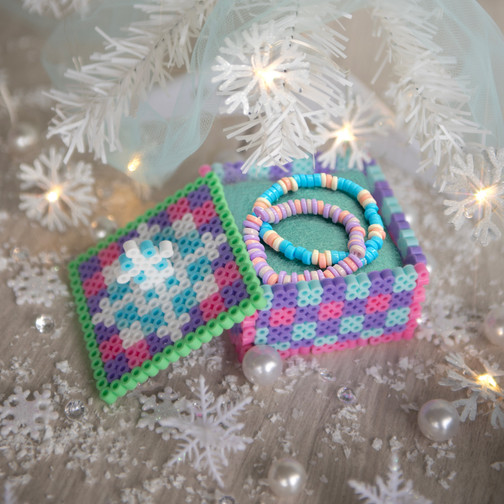
This sweet little gift box is perfect for jewelry, candy, or other small trinkets.
Use Perler fuse beads to make this charming autumn wall hanging. Use the colors shown or create your own unique combinations.
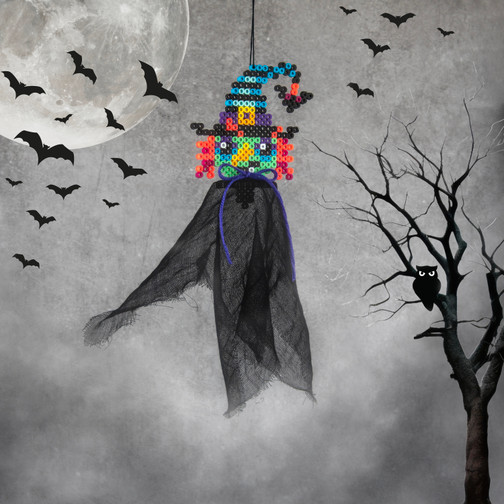
Create a spooky witch using Perler fuse beads and let it soar on Halloween night!
These unique 3-D pinecone ornaments will be a welcome addition to your autumn décor. You can add string or twine to hang them or lay them on a table or windowsill with other fall décor.
Fall is in the air and this clothespin wreath accented with Perler bead flowers will be a welcoming accent to your door or wall.
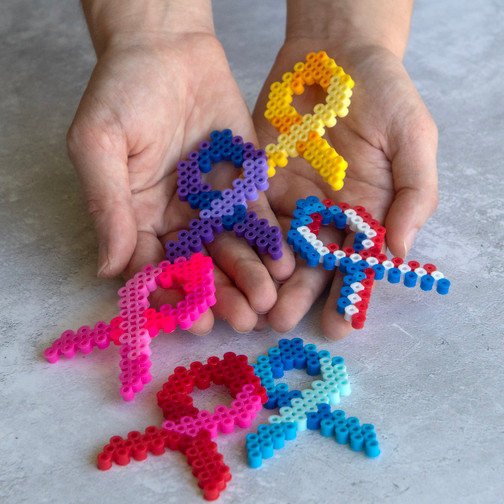
Support your favorite cause with an awareness ribbon made from Perler fuse beads. Attach a magnet or pin back to display your ribbon.
Keep your school supplies organized with this school bus desk caddy created with Perler fusible beads. Pieces easily snap together to form this unique organizer.
It’s almost back-to-school time! This perpetual calendar made from Perler fuse beads is perfect for gifting to a special teacher.
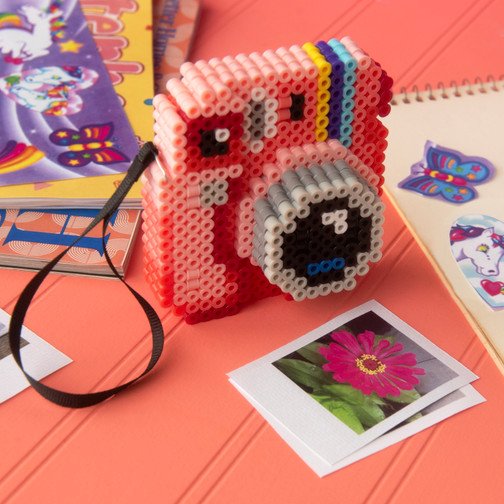
Keep the memories of your first instant camera alive with this cute 3-D replica. Prop your finished design on a desk or shelf.
Make one or all these colorful bracelets. Great fun for family and friends!
Add of touch of nostalgia to a backpack, purse, or lanyard with these fun retro icons.
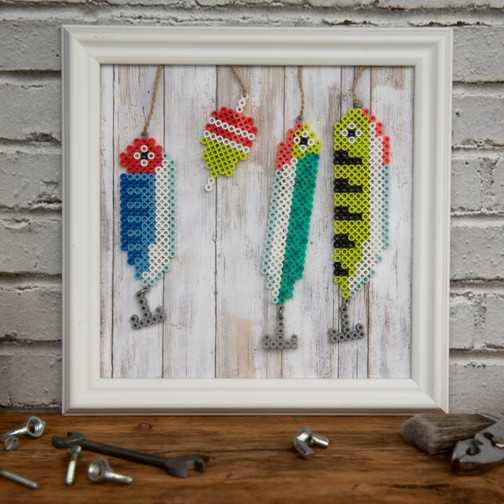
Create a unique piece of wall art with these Perler bead fishing lures. Project makes a great gift for the fisherman in your family.
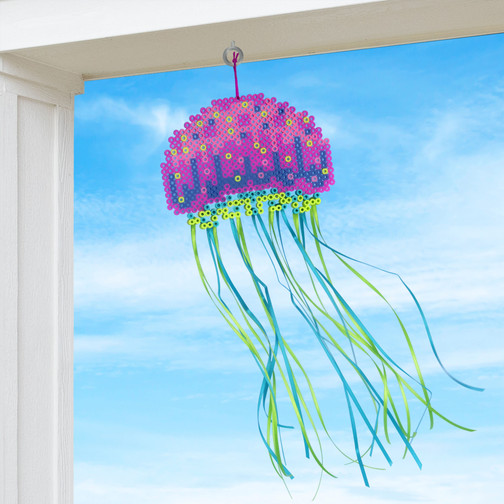
Make this cute fuse bead jellyfish wind streamer to hang on a porch or patio. If you want to use it indoors, you can hang it from the ceiling or display on a wall, door, or window.
Keep summer memories alive with this unique layered frame made with Perler fuse beads.
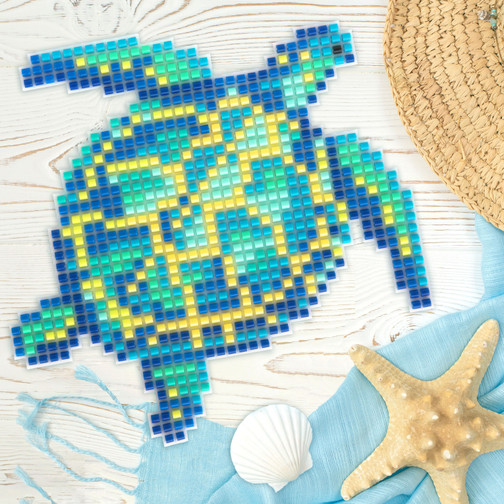
Create this whimsical sea turtle using the new Snappix frosted mesh canvas from Perler. It’s so easy to snap classic Perler beads into the flexible canvas to make a unique artful design.
Venture into the depths of the sea to find this cute no-iron design! Perler beads can be used in lots of creative ways besides fusing with an iron and this tropical fish is just one example of those
This fuse bead project will have you thinking of warm tropical days by the ocean. Make your own water globe to display all summer long on a shelf, desk, or table.
Create some trendy tile designs with Perler fuse beads and turn them into wall hooks—a fun project that’s both stylish and functional!
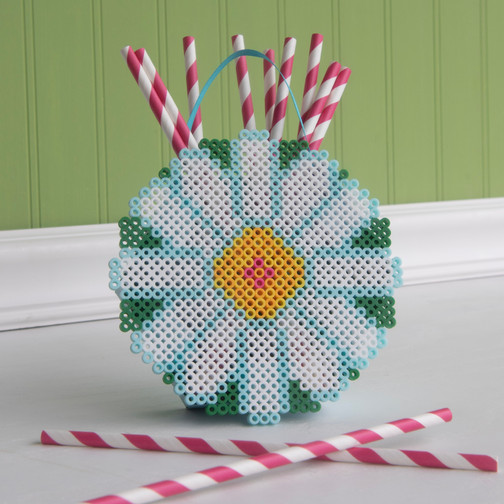
Make a unique container that features a bold and bright fuse bead daisy. The finished project can be hung or displayed on a table or shelf.
Create a handmade gift for a special teacher using Perler fuse beads and a purchased chalkboard. It’s a great way to express your gratitude during Teacher Appreciation Week.
Welcome spring with this cute no-iron bead design! Perler beads can be used in lots of creative ways, and this winged beauty is just one example of how to use the beads for something other than a f
Spring has sprung on this pretty frame that features colorful blooms. Prop your finished design on a shelf or windowsill or attach your own magnets to hang on a refrigerator or metal cabinet.
Pretty shades of Perler beads are used to create this butterfly and flower garland. Glue the fused bead designs to your own coordinating ribbon or string and display the garland in any room of your ho